{classic picnic food}
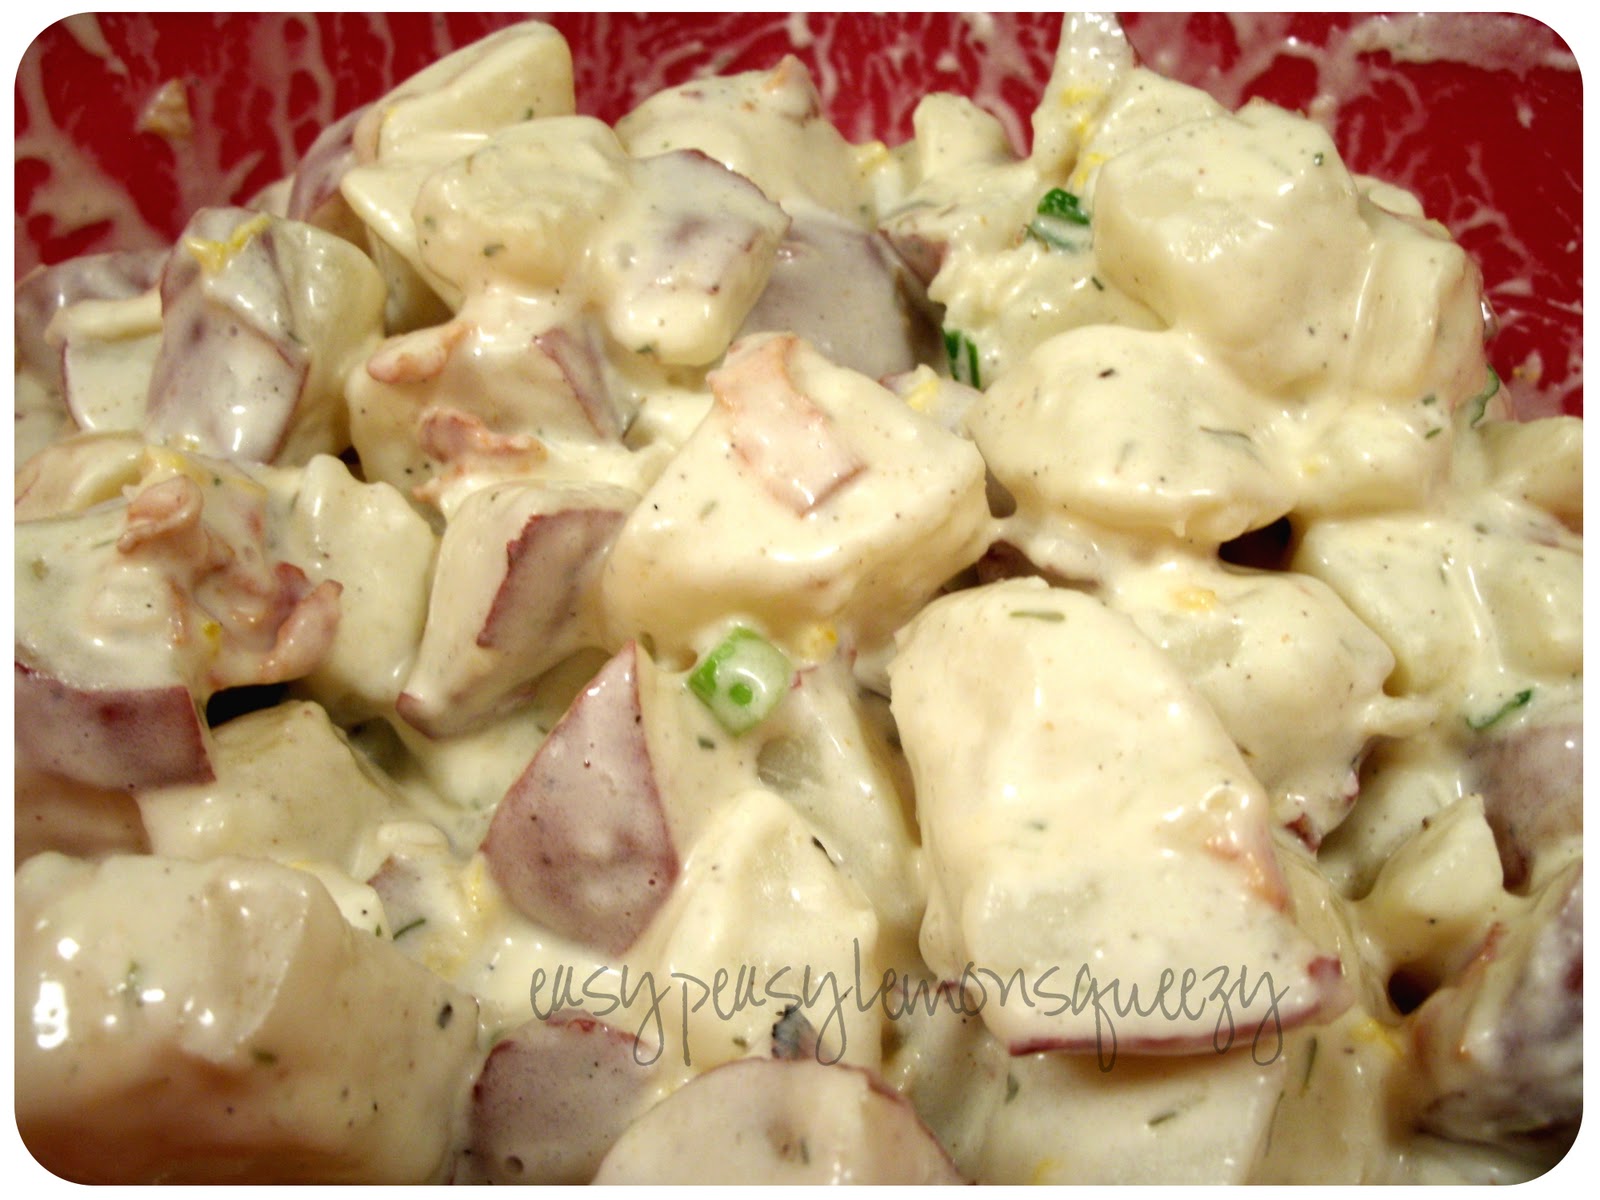
Let's just announce the elephant in the room right off the bat- yes, this picture is absolutely horrid. But that's what makes it unique. Everyone knows what potato salad looks like anyways, so maybe you just have to use your imagination a little bit to figure out what it should look like. Now with that being said, I have to admit that potato salad isn't something I love to eat. For any of you that attended high school choir with me, maybe you know why my image of potato salad has been permanently scarred. For those of who didn't have the luxury of hearing a rather nauseating story about potato salad... I'll save you the pain and agony by not telling you. After trying this recipe, I can now say that potato salad is back on my good side! I've never had a potato salad quite like this before... ya know, with bacon in it... Everything is better with bacon. Again, sorry for how awful this picture is!
Ingredients:
5 lbs. red potatoes
2 cups mayo
1/4 cup vinegar
1/4 lb. bacon
1/4 cup bell pepper, finely chopped
1 green onion, finely chopped
2 tablespoons Worcestershire sauce
1 tablespoon pickle juice (optional)
1 teaspoon salt
1 teaspoon pepper
1 teaspoon dried thyme
Directions:
In a large stock pot, stick all your potatoes in pot and add enough water to cover. Boil for 20-25 minutes or until potatoes are just tender. Meanwhile, slice your bacon into small pieces and fry until slightly crispy. Drain and then set aside. This is also a good time to chop your bell pepper and onion, and measure out the rest of the ingredients. Once your potatoes are done, drain and let stand until cool. Cut up into bite size pieces and add to a large bowl. Add bell pepper, onion and bacon and toss gently. In a small bowl, combine mayo, vinegar, pickle juice and seasonings. Pour over potatoes and mix until evenly coated. Refrigerate for 1-2 hours before serving.
Source: Essential Mormon Cookbook
Showing posts with label Crowd Pleasers. Show all posts
1.10.2011
12.20.2010
Jalapeno Popper Dip
{ya know, like those popper thingies from Chili's}
You may or may not know this about me, but I really want to be a socialite. It's on my bucket list. Since my natural charm is masked by coyness, the only way to wiggle my way into the socialite life is through people's stomachs. I like to throw parties and I like to cook for large crowds, I don't know what it is, but I like it. My itty bitty ghetto kitchen makes it difficult but that's half the fun! I'm pretty much excited for this recipe (and so was Tressa, she called this morning for the recipe even before I had it posted). Are you wondering whether or not it was deliciously divine? Let me answer that with another question- why don't I have a picture of the dish without a spoonful missing? People started eating it before I was able to even get a picture!
Ingredients:
2 (8oz) packages cream cheese, softened
1 cup Mayonnaise
1 8oz (250 ml) jar sliced Jalapeno peppers
1 4oz can chopped green chilies, drained
1/2 red pepper, chopped
2 cups shredded Mexican blend cheese
1/2 cup Corn Flake crumbs (or bread crumbs)
Parmesan cheese
Jalapeno slices for garnish
Directions:
Preheat oven to 375F, spray a round or square 9x9 or 8x8 inch baking dish with cooking spray. In a large bowl mix together cream cheese, mayo, chilies, Jalapeno's, red pepper and shredded cheese together until smooth and creamy. Pour mixture into baking dish. Sprinkle with Parmesan cheese and corn flake crumbs/bread crumbs. Bake for 25-30 minutes or until hot and melted through. Let cool for 10 minutes and garnish with slices of Jalapenos, serve warm with Baguettes, veggies, crackers, etc. There ya go!
Source: Annie's Eats via My Baking Addiction
You may or may not know this about me, but I really want to be a socialite. It's on my bucket list. Since my natural charm is masked by coyness, the only way to wiggle my way into the socialite life is through people's stomachs. I like to throw parties and I like to cook for large crowds, I don't know what it is, but I like it. My itty bitty ghetto kitchen makes it difficult but that's half the fun! I'm pretty much excited for this recipe (and so was Tressa, she called this morning for the recipe even before I had it posted). Are you wondering whether or not it was deliciously divine? Let me answer that with another question- why don't I have a picture of the dish without a spoonful missing? People started eating it before I was able to even get a picture!
Ingredients:
2 (8oz) packages cream cheese, softened
1 cup Mayonnaise
1 8oz (250 ml) jar sliced Jalapeno peppers
1 4oz can chopped green chilies, drained
1/2 red pepper, chopped
2 cups shredded Mexican blend cheese
1/2 cup Corn Flake crumbs (or bread crumbs)
Parmesan cheese
Jalapeno slices for garnish
Directions:
Preheat oven to 375F, spray a round or square 9x9 or 8x8 inch baking dish with cooking spray. In a large bowl mix together cream cheese, mayo, chilies, Jalapeno's, red pepper and shredded cheese together until smooth and creamy. Pour mixture into baking dish. Sprinkle with Parmesan cheese and corn flake crumbs/bread crumbs. Bake for 25-30 minutes or until hot and melted through. Let cool for 10 minutes and garnish with slices of Jalapenos, serve warm with Baguettes, veggies, crackers, etc. There ya go!
Source: Annie's Eats via My Baking Addiction
12.02.2010
Apple Cider Caramels
{christmas and candy wrapped up together in one simple bite}
So I saw these, and thought "um, yum." I could not form words other than "those would look good on my blog." Thus, I had to make them. This was my first time making candy without my mom's supervision. I remember when I was a kid coming over to my grandma's and seeing rows and rows and pans spread out all over the house full of home made candy. The only thing I was allowed to do was stir the sugary syrup. Making these caramels brought back a lot of good memories. It's too bad all my hard work and hours of effort turned rock solid almost immediately the minute it left the hot burner. I was so upset and disappointed- yet determined so the next day I got right back up and started again. So without further adieu, I would like to present my first ever batch of caramels!
I've got a lot of pictures of these babies... fair warning!
Ingredients:
2 cups Simply Apple, apple juice (found next to the Simply Orange in your grocery store's juice department)
1 cup whipping cream, divided
1 teaspoon cinnamon
1/2 teaspoon nutmeg
1/2 teaspoon allspice
1 1/2 cup brown sugar (or white sugar)
1/3 cup corn syrup
1/2 cup butter
Other things you will need:
candy thermometer
large stock pot and a medium sauce pan
cooking spray
glass measuring cup (or one that can stand up against high heat)
Directions:
Pour apple cider into medium sauce pan, boil on high until it reduces to 1/3 cup- about 20 minutes, this is where the glass measuring up comes in handy. Once it's reduced, set aside to cool, but not too cool or else it will turn into a jelly (I found that out the hard way). If that does happen, put it back on the heat and stir.
Line an 8x8 inch square baking dish with wax paper leaving about an inch over the top for easy removal, and spray generously with cooking spray and set aside.
In a small bowl, combine 2/3 cup whipping cream, cinnamon, nutmeg, allspice and reduced apple cider. Set aside.
In large stock pot, combine sugar, corn syrup, and 1/3 cup whipping cream plus enough water to reach the 1/2 cup mark. Cook over low heat until the sugar dissolves, insert the candy thermometer and simmer until it reaches 234 degrees Fahrenheit. This took about 45 minutes for me, and because of the altitude my candy never reached that exact temperature- you can tell when it should be removed. The candy will turn dark in color and begin to thicken, the bubbles will look differently as well. Don't over cook.
Remove from heat and slowly whisk in the cream and cider mixture- might splatter a little, be careful. Add butter a little at a time in cubes or spoonfuls and mix until well incorporated. Return to low heat and re-insert candy thermometer and cook, stirring frequently until the mixture reaches 248F, about another 30(ish) minutes. Again, mine never quite got that hot- you can tell by the texture and color etc. Again, don't over cook. You'll end up with toffee instead of a caramel. Trust me!
Remove from heat and pour into prepared baking dish. Let cool completely before removing from pan (with the wax paper). Cut horizontally... (I used a pizza cutter)
Then cut again vertically...
You can kind of make whatever size caramels you'd like... I ended up cutting these in half again to about the size of a Tootsie Roll. Cut wax paper into 2x4 inch squares, and wrap each individual caramel, and twist the ends, also like a Tootsie Roll.
Wrapping them is very tedious, I wont lie. If your caramels stick to the wax paper as you are trying to remove each little square, don't worry mine did that, too. Just go slow and use a knife to scrap them off... patience young Padawan.
So I saw these, and thought "um, yum." I could not form words other than "those would look good on my blog." Thus, I had to make them. This was my first time making candy without my mom's supervision. I remember when I was a kid coming over to my grandma's and seeing rows and rows and pans spread out all over the house full of home made candy. The only thing I was allowed to do was stir the sugary syrup. Making these caramels brought back a lot of good memories. It's too bad all my hard work and hours of effort turned rock solid almost immediately the minute it left the hot burner. I was so upset and disappointed- yet determined so the next day I got right back up and started again. So without further adieu, I would like to present my first ever batch of caramels!
I've got a lot of pictures of these babies... fair warning!
Ingredients:
2 cups Simply Apple, apple juice (found next to the Simply Orange in your grocery store's juice department)
1 cup whipping cream, divided
1 teaspoon cinnamon
1/2 teaspoon nutmeg
1/2 teaspoon allspice
1 1/2 cup brown sugar (or white sugar)
1/3 cup corn syrup
1/2 cup butter
Other things you will need:
candy thermometer
large stock pot and a medium sauce pan
cooking spray
glass measuring cup (or one that can stand up against high heat)
Directions:
Pour apple cider into medium sauce pan, boil on high until it reduces to 1/3 cup- about 20 minutes, this is where the glass measuring up comes in handy. Once it's reduced, set aside to cool, but not too cool or else it will turn into a jelly (I found that out the hard way). If that does happen, put it back on the heat and stir.
Line an 8x8 inch square baking dish with wax paper leaving about an inch over the top for easy removal, and spray generously with cooking spray and set aside.
In a small bowl, combine 2/3 cup whipping cream, cinnamon, nutmeg, allspice and reduced apple cider. Set aside.
In large stock pot, combine sugar, corn syrup, and 1/3 cup whipping cream plus enough water to reach the 1/2 cup mark. Cook over low heat until the sugar dissolves, insert the candy thermometer and simmer until it reaches 234 degrees Fahrenheit. This took about 45 minutes for me, and because of the altitude my candy never reached that exact temperature- you can tell when it should be removed. The candy will turn dark in color and begin to thicken, the bubbles will look differently as well. Don't over cook.
Remove from heat and slowly whisk in the cream and cider mixture- might splatter a little, be careful. Add butter a little at a time in cubes or spoonfuls and mix until well incorporated. Return to low heat and re-insert candy thermometer and cook, stirring frequently until the mixture reaches 248F, about another 30(ish) minutes. Again, mine never quite got that hot- you can tell by the texture and color etc. Again, don't over cook. You'll end up with toffee instead of a caramel. Trust me!
Remove from heat and pour into prepared baking dish. Let cool completely before removing from pan (with the wax paper). Cut horizontally... (I used a pizza cutter)
Then cut again vertically...
You can kind of make whatever size caramels you'd like... I ended up cutting these in half again to about the size of a Tootsie Roll. Cut wax paper into 2x4 inch squares, and wrap each individual caramel, and twist the ends, also like a Tootsie Roll.
Wrapping them is very tedious, I wont lie. If your caramels stick to the wax paper as you are trying to remove each little square, don't worry mine did that, too. Just go slow and use a knife to scrap them off... patience young Padawan.
Makes about 80 Tootsie Roll size pieces, and 40 average caramel size pieces.
Source: Our Best Bites
11.16.2010
Raspberry Swirl Cheesecake Cupcakes
{my house smells like the cheesecake factory}
I've been anxiously awaiting for today to come for many weeks. Why? I finally have the chance to make a ton of baked goods- and have a place with many mouths to transport said baked goods to. Sometimes I run into the problem of not having enough people to eat all the things I make- and that doesn't make husby very happy. I've been wanting to make these baby cakes for a really long time. Unfortunately, I skipped the water bath as suggested by Martha Stewart because I didn't have a way to create one- so I think these could have been better, but I'm not complaining. I found these to be a bit of a more challenging recipe, which is right up my ally. Go big or go home is my motto. Don't let that scare you, there are definitely some short cuts.
Ingredients:
for the cheesecake:
16 oz cream cheese (two regular size packages)
1 1/2 cups sugar
1 tablespoon vanilla
4 eggs
1 teaspoon lemon juice (optional- but after tasting one, I think a little zip of lemon would go really well)
for the raspberry topping:
6 oz fresh or frozen raspberries
2 tablespoons sugar
for the crust: (you could buy the premade crumbs, but I found with one box of graham crackers, I could double the recipe whereas with the premade crumbs, I could only do one batch)
22 Graham crackers
4 tablespoons butter, melted
2 tablespoons sugar
Directions:
Preheat oven to 325F. Line cupcake pan with liners. In a food processor, process graham crackers until crumbly. Switch crumbs into a bowl, and mix in butter and sugar and stir with a fork until the crumbs are moistened. Fill each cupcake liner with 1 tablespoon of crumbs. Use a small drinking glass to press the crumbs down. Bake for 5 minutes or until set. Set aside to cool.
Also in your food processor (obviously you can make the crumbs ahead of time) puree raspberries and sugar. Strain puree into a bowl using a strainer to collect the seeds. Set aside.
In a large mixing bowl, blend cream cheese until fluffy. Add sugar and blend again until well mixed. Add vanilla and mix again. Add each egg one at a time, mixing in between each addition. Pour 3 tablespoons (or 1/4 cup if you have a little measuring up like me ;) ) of cheesecake mixture onto the graham cracker crusts. Once each one has been filled, take a 1/2 teaspoon of raspberry puree and dot it on the top. Take a tooth pick and swirl it around.
Pop them in the oven and bake for about 22 minutes. Now, if you have a pan big enough and have enough room in your kitchen feel free to do a water bath, but again, I skipped it and the only thing that happened was my cheesecakes kind of sank down little in the centers. Make sure you sit in front of your oven and watch them like a nerd. Just kidding, you don't have to.
Remove from oven and let cool to room temperature, then refrigerate for at least 4 hours before serving. Not so bad, right? You will die when you smell these out of the oven... :)
Source: Annie's Eats via Martha Stewart
I've been anxiously awaiting for today to come for many weeks. Why? I finally have the chance to make a ton of baked goods- and have a place with many mouths to transport said baked goods to. Sometimes I run into the problem of not having enough people to eat all the things I make- and that doesn't make husby very happy. I've been wanting to make these baby cakes for a really long time. Unfortunately, I skipped the water bath as suggested by Martha Stewart because I didn't have a way to create one- so I think these could have been better, but I'm not complaining. I found these to be a bit of a more challenging recipe, which is right up my ally. Go big or go home is my motto. Don't let that scare you, there are definitely some short cuts.
Ingredients:
for the cheesecake:
16 oz cream cheese (two regular size packages)
1 1/2 cups sugar
1 tablespoon vanilla
4 eggs
1 teaspoon lemon juice (optional- but after tasting one, I think a little zip of lemon would go really well)
for the raspberry topping:
6 oz fresh or frozen raspberries
2 tablespoons sugar
for the crust: (you could buy the premade crumbs, but I found with one box of graham crackers, I could double the recipe whereas with the premade crumbs, I could only do one batch)
22 Graham crackers
4 tablespoons butter, melted
2 tablespoons sugar
Directions:
Preheat oven to 325F. Line cupcake pan with liners. In a food processor, process graham crackers until crumbly. Switch crumbs into a bowl, and mix in butter and sugar and stir with a fork until the crumbs are moistened. Fill each cupcake liner with 1 tablespoon of crumbs. Use a small drinking glass to press the crumbs down. Bake for 5 minutes or until set. Set aside to cool.
Also in your food processor (obviously you can make the crumbs ahead of time) puree raspberries and sugar. Strain puree into a bowl using a strainer to collect the seeds. Set aside.
In a large mixing bowl, blend cream cheese until fluffy. Add sugar and blend again until well mixed. Add vanilla and mix again. Add each egg one at a time, mixing in between each addition. Pour 3 tablespoons (or 1/4 cup if you have a little measuring up like me ;) ) of cheesecake mixture onto the graham cracker crusts. Once each one has been filled, take a 1/2 teaspoon of raspberry puree and dot it on the top. Take a tooth pick and swirl it around.
Pop them in the oven and bake for about 22 minutes. Now, if you have a pan big enough and have enough room in your kitchen feel free to do a water bath, but again, I skipped it and the only thing that happened was my cheesecakes kind of sank down little in the centers. Make sure you sit in front of your oven and watch them like a nerd. Just kidding, you don't have to.
Remove from oven and let cool to room temperature, then refrigerate for at least 4 hours before serving. Not so bad, right? You will die when you smell these out of the oven... :)
Source: Annie's Eats via Martha Stewart
11.05.2010
Quick Cinnamon Rolls
{so sweet i can feel the cavities and diabetes setting in}
I don't know about you but when you are out shopping at the malls with the scent of the CinnaBun station from what seems like miles away, some form of symbiosis happens in my brain, and I immediately think- Christmas. But really, they are good any time of the year! Just make sure to go see your dentist after wards.
Ingredients:
1 3/4 cup warm water
6 tablespoons sugar
1/2 cup oil
3 tablespoons instant yeast
1 1/2 teaspoon salt
2 eggs
5 1/2 cups flour
1/3 cup butter, at room temperature
1 cup brown sugar
2 1/2 tablespoons cinnamon (essentially as much or as little as you'd like)
Directions:
In a medium bowl add water, sugar, oil and yeast. Mix to combine and let rise for 15 minutes. In a large bowl, or stand mixer with bread hook, add yeast mixture, half the flour, salt and eggs. Mix with hook, once it's combined add remaining flour. Dough should clear the sides of the bowl. If you don't have a stand mixer, your hands work just fine! Spray your counter, and roll out dough into a 1/2 inch thick rectangle. Spread with a thin layer of butter, enough so your cinnamon and brown sugar will stick to the dough. Sprinkle cinnamon, and then sprinkle with brown sugar. Roll up long ways, and cut into 18 (1 inch thick) slices. Dental floss works great. Place on sprayed cookie sheet. Let rise for for 15 minutes.
After a final rising, pop them in the oven and bake at 400F for 15 minutes, or until the tops are slightly browned. Cool slightly and frost with your favorite icing.
Powdered Sugar Icing:
2 1/2 cups powdered sugar
1 teaspoon vanilla
2 tablespoons milk
Mix together in a medium bowl. Add more milk or powdered sugar to reach the consistency to drizzle over cinnamon rolls.
Cream Cheese Frosting:
1 3oz package of cream cheese
1/4 cup butter, softened
1 1/2 cup powdered sugar
1/2 teaspoon vanilla
Beat cream cheese and butter with electric mixer until smooth, then add powdered sugar and mix until well blended, then add vanilla and beat until smooth and creamy.
I don't know about you but when you are out shopping at the malls with the scent of the CinnaBun station from what seems like miles away, some form of symbiosis happens in my brain, and I immediately think- Christmas. But really, they are good any time of the year! Just make sure to go see your dentist after wards.
Ingredients:
1 3/4 cup warm water
6 tablespoons sugar
1/2 cup oil
3 tablespoons instant yeast
1 1/2 teaspoon salt
2 eggs
5 1/2 cups flour
1/3 cup butter, at room temperature
1 cup brown sugar
2 1/2 tablespoons cinnamon (essentially as much or as little as you'd like)
Directions:
In a medium bowl add water, sugar, oil and yeast. Mix to combine and let rise for 15 minutes. In a large bowl, or stand mixer with bread hook, add yeast mixture, half the flour, salt and eggs. Mix with hook, once it's combined add remaining flour. Dough should clear the sides of the bowl. If you don't have a stand mixer, your hands work just fine! Spray your counter, and roll out dough into a 1/2 inch thick rectangle. Spread with a thin layer of butter, enough so your cinnamon and brown sugar will stick to the dough. Sprinkle cinnamon, and then sprinkle with brown sugar. Roll up long ways, and cut into 18 (1 inch thick) slices. Dental floss works great. Place on sprayed cookie sheet. Let rise for for 15 minutes.
After a final rising, pop them in the oven and bake at 400F for 15 minutes, or until the tops are slightly browned. Cool slightly and frost with your favorite icing.
Powdered Sugar Icing:
2 1/2 cups powdered sugar
1 teaspoon vanilla
2 tablespoons milk
Mix together in a medium bowl. Add more milk or powdered sugar to reach the consistency to drizzle over cinnamon rolls.
Cream Cheese Frosting:
1 3oz package of cream cheese
1/4 cup butter, softened
1 1/2 cup powdered sugar
1/2 teaspoon vanilla
Beat cream cheese and butter with electric mixer until smooth, then add powdered sugar and mix until well blended, then add vanilla and beat until smooth and creamy.
10.27.2010
Pumpkin Whoopie Pies
{pumpkin pie has met its match}
I saw these when I was browsing... somewhere out there in cyberspace. And all it took was one look, and I was immediately head over heels and the site was saved in my bookmarks three seconds later. To say that I was excited to try this out, is an understatement. This definitely worked as a great test run for YW's In Excellence in two weeks- I'm in charge of treats, and I've been brainstorming ideas for the evening, and these I think are in my top 5.
Ingredients:
1 1/2 cups all purpose flour
1/2 teaspoon salt
1/2 teaspoon baking powder
1/2 teaspoon baking soda
1 tablespoon cinnamon
1/2 tablespoon ginger
1/2 tablespoon ground cloves
1 cup brown sugar
1/2 cup oil
1 1/2 cups canned pumpkin
1 egg
1/2 teaspoon vanilla
For the frosting:
1/4 cup butter, at room temperature
1 8oz package cream cheese, at room temperature
3 cups powdered sugar
1 teaspoon vanilla
Directions:
Preheat oven to 325F. Combine flour, salt, baking powder, baking soda, and spices in a bowl, and whisk together. In another bowl, beat brown sugar and oil until combined, then add the pumpkin, and whisk together. Add vanilla and the egg, and mix again until combined. Fold in dry ingredients until incorporated. Line two cookie sheets with parchment paper. Use a melon baller (or something that measures 2 tablespoons) to scoop the batter on to the cookie sheet- two inches apart. Bake for 9-10 minutes, OR until a toothpick comes out clean. Let cookies sit for 5 minutes before moving to a wire wrack to cool.
To make the frosting, beat the butter until creamy, about 30 seconds, then add in the cream cheese. Beat on medium for about 1 minute until mixture is creamy and fluffy. Add powdered sugar and vanilla, and beat again until desired consistency. If too thick, add a couple teaspoons of milk and if too runny, add 1/2 cup powdered sugar.
Once the cookies are cooled, and the frosting is all frosting-y, using a small spoon, scoop up some frosting and dollop it on the flat underside of one cookie, and sandwich it with another cookie, flat sides together. Repeat. If you wanted to get fancy, you could pipe the frosting.
Once they are all assembled, put them in the fridge for at least 30 minutes before serving!
Just a tip: if the tops of your little cookies are a bit rigid from sticking to the utensil you used to scoop them onto the baking sheet- before baking, dip the tips of your fingers in water and smooth out the little peaks.
Source: Teenie Cakes
I saw these when I was browsing... somewhere out there in cyberspace. And all it took was one look, and I was immediately head over heels and the site was saved in my bookmarks three seconds later. To say that I was excited to try this out, is an understatement. This definitely worked as a great test run for YW's In Excellence in two weeks- I'm in charge of treats, and I've been brainstorming ideas for the evening, and these I think are in my top 5.
Ingredients:
1 1/2 cups all purpose flour
1/2 teaspoon salt
1/2 teaspoon baking powder
1/2 teaspoon baking soda
1 tablespoon cinnamon
1/2 tablespoon ginger
1/2 tablespoon ground cloves
1 cup brown sugar
1/2 cup oil
1 1/2 cups canned pumpkin
1 egg
1/2 teaspoon vanilla
For the frosting:
1/4 cup butter, at room temperature
1 8oz package cream cheese, at room temperature
3 cups powdered sugar
1 teaspoon vanilla
Directions:
Preheat oven to 325F. Combine flour, salt, baking powder, baking soda, and spices in a bowl, and whisk together. In another bowl, beat brown sugar and oil until combined, then add the pumpkin, and whisk together. Add vanilla and the egg, and mix again until combined. Fold in dry ingredients until incorporated. Line two cookie sheets with parchment paper. Use a melon baller (or something that measures 2 tablespoons) to scoop the batter on to the cookie sheet- two inches apart. Bake for 9-10 minutes, OR until a toothpick comes out clean. Let cookies sit for 5 minutes before moving to a wire wrack to cool.
To make the frosting, beat the butter until creamy, about 30 seconds, then add in the cream cheese. Beat on medium for about 1 minute until mixture is creamy and fluffy. Add powdered sugar and vanilla, and beat again until desired consistency. If too thick, add a couple teaspoons of milk and if too runny, add 1/2 cup powdered sugar.
Once the cookies are cooled, and the frosting is all frosting-y, using a small spoon, scoop up some frosting and dollop it on the flat underside of one cookie, and sandwich it with another cookie, flat sides together. Repeat. If you wanted to get fancy, you could pipe the frosting.
Once they are all assembled, put them in the fridge for at least 30 minutes before serving!
Just a tip: if the tops of your little cookies are a bit rigid from sticking to the utensil you used to scoop them onto the baking sheet- before baking, dip the tips of your fingers in water and smooth out the little peaks.
Source: Teenie Cakes
10.25.2010
Turkey!
{oh my goodness i love thanksgiving}
This was my first time hosting Thanksgiving. You're thinking, 'Thanksgiving, on October 24th?'. Yes. I missed Canadian Thanksgiving, and here in Canada, American Thanksgiving isn't recognized, and you don't get time off of work. So we decided to do it yesterday, and it was a success! I have to admit, without Warren it wouldn't have happened... I gagged the whole time when he was playing with the bird before it was cooked. Blech! You laugh, but it's true. Also, let me tell you the secret that made our turkey especially delicious. Thanks to my good friend Erin, who sent me a link on to do this with a chicken, we now have a perfect recipe for turkey to go into our recipe collection. Boo ya! Want to know the secret? Okay, you twisted my arm. It's Mayo! Say what?! Yeah, Mayo.
Ingredients... really?
A turkey
a cup of Mayo
basic seasonings
What ya do is, once all the giblet bags are out (you're gonna wanna make sure it's thawed first), you are going to spread Mayo all over the turkey (minus the bottom, obviously). Then add your seasonings. I used thyme, some oregano, some garlic powder, and some salt and pepper. Cover with foil, then pop that bad boy into the oven and cook it for the time specified on the package. Best part... no basting needed!
Ta da!
Source: Rookie Cookie Roast Chicken
This was my first time hosting Thanksgiving. You're thinking, 'Thanksgiving, on October 24th?'. Yes. I missed Canadian Thanksgiving, and here in Canada, American Thanksgiving isn't recognized, and you don't get time off of work. So we decided to do it yesterday, and it was a success! I have to admit, without Warren it wouldn't have happened... I gagged the whole time when he was playing with the bird before it was cooked. Blech! You laugh, but it's true. Also, let me tell you the secret that made our turkey especially delicious. Thanks to my good friend Erin, who sent me a link on to do this with a chicken, we now have a perfect recipe for turkey to go into our recipe collection. Boo ya! Want to know the secret? Okay, you twisted my arm. It's Mayo! Say what?! Yeah, Mayo.
Ingredients... really?
A turkey
a cup of Mayo
basic seasonings
What ya do is, once all the giblet bags are out (you're gonna wanna make sure it's thawed first), you are going to spread Mayo all over the turkey (minus the bottom, obviously). Then add your seasonings. I used thyme, some oregano, some garlic powder, and some salt and pepper. Cover with foil, then pop that bad boy into the oven and cook it for the time specified on the package. Best part... no basting needed!
Ta da!
Source: Rookie Cookie Roast Chicken
10.21.2010
Cranberry Pummmmpkin Bread
{tis' the freakin' season}
Can I just tell you how much I love pumpkin flavored anything? It's funny because pumpkin pie, is not my number one favorite. But put pumpkin in anything else, and I'm yours. I can't get enough of it! I especially love the way it makes your house smell. Reminds me of grandma's house during November and December. It's so welcoming and pleasant. I thought that breads like this were for experienced bakers only. To my surprise, it was quite easy-- minus of course, my big flaw of not cooking the first loaf entirely before taking it out of the oven. That's right my friends, this is the second loaf! The inside of the first loaf, literally was the same consistency of the batter that went into the oven in the beginning. I went ahead and did some research on why this happened, and what I could do to rectify it. So here is what I found:
Ingredients:
1/4 cup butter
1 cup sugar
2 eggs
1 cup canned pumpkin
1 3/4 cup flour
1 teaspoon baking soda
1 teaspoon cinnamon
1/2 teaspoon salt
1/2 teaspoon nutmeg
1/4 teaspoon ground ginger
1/4 teaspoon ground cloves
1 cup fresh or frozen cranberries (optional) (you could also throw in nuts and/or chocolate chips)
Directions:
Cream butter, sugar, and eggs. Add pumpkin and mix; set aside. In another bowl sift flour, baking soda, and spices. Gradually add dry ingredients to creamy mixture. Mix until just blended. Fold in cranberries. Grease one loaf pan or four mini loaves. Pour batter into pans. For one loaf, bake at 350F for about 1 hour or until toothpick comes out clean. For mini loaves, bake at 350F for about 35-40 minutes.
FYI... this makes a fantastic gift to give to your neighbors and friends!
recipe adapted from The Essential Mormon Cookbook.
Can I just tell you how much I love pumpkin flavored anything? It's funny because pumpkin pie, is not my number one favorite. But put pumpkin in anything else, and I'm yours. I can't get enough of it! I especially love the way it makes your house smell. Reminds me of grandma's house during November and December. It's so welcoming and pleasant. I thought that breads like this were for experienced bakers only. To my surprise, it was quite easy-- minus of course, my big flaw of not cooking the first loaf entirely before taking it out of the oven. That's right my friends, this is the second loaf! The inside of the first loaf, literally was the same consistency of the batter that went into the oven in the beginning. I went ahead and did some research on why this happened, and what I could do to rectify it. So here is what I found:
Bread sticks to pan. Unless you're using high-quality nonstick metal or silicone baking pans, you should always grease the pans before you pour in the batter. The best thing to use for greasing the pan is shortening, because its melting point is higher than any other kind of fat, which helps maintain a "shield" between pan and batter while the bread is baking. A high-quality cooking spray--one that won't bake on to your pans and discolor them--is also a fast, easy fix. You can also prevent sticking by removing the bread from the pan sooner: let the bread cool for at least twenty minutes in order to set (Bundt loaves should cool twice as long) before inverting the pan.Taken from allrecipes.com. So... I had to try it again to prove that I could do it. And whadda know... it worked! I adjusted my oven temperature and I covered it with foil the last 10 minutes, and now I have yummy, yummy pumpkin bread to eat!
There are big holes and "tunnels" in the bread, and/or the bread is tough. These problems are usually caused by over-mixing. See above, Mixing the Batter, about mixing technique.
There's a big crack down the middle of the quick bread loaf. The crack on top happens when top of the loaf "sets" in the heat of the oven before the bread is finished rising. Don't worry--it's normal for quick breads. Drizzle the loaf with icing or dust with confectioners' sugar.
The bread looks done on the outside but it's still raw in the middle. This is one of the most common quick bread problems, and it can be caused by a few different factors. The oven temperature could be too high. (Use an oven thermometer to check: they're cheap and available at most supermarkets.)
Try lowering the oven temperature and/or putting a loose tent of foil over the top of the bread so it won't burn before the middle has time to catch up.
Another cause of "raw center" syndrome could be using a different pan than the recipe calls for. One of the nice things about quick breads is that you can use the same batter to make muffins, mini loaves, jumbo loaves, or rounds. But each size requires different baking times--and some require different baking temperatures. The larger and thicker the loaf, the longer it's going to take to bake. If you're using a different size pan than your recipe calls for, adjust the baking time accordingly and check the bread often.
Ingredients:
1/4 cup butter
1 cup sugar
2 eggs
1 cup canned pumpkin
1 3/4 cup flour
1 teaspoon baking soda
1 teaspoon cinnamon
1/2 teaspoon salt
1/2 teaspoon nutmeg
1/4 teaspoon ground ginger
1/4 teaspoon ground cloves
1 cup fresh or frozen cranberries (optional) (you could also throw in nuts and/or chocolate chips)
Directions:
Cream butter, sugar, and eggs. Add pumpkin and mix; set aside. In another bowl sift flour, baking soda, and spices. Gradually add dry ingredients to creamy mixture. Mix until just blended. Fold in cranberries. Grease one loaf pan or four mini loaves. Pour batter into pans. For one loaf, bake at 350F for about 1 hour or until toothpick comes out clean. For mini loaves, bake at 350F for about 35-40 minutes.
FYI... this makes a fantastic gift to give to your neighbors and friends!
recipe adapted from The Essential Mormon Cookbook.
Labels:
Bread,
Comfort Food,
Crowd Pleasers,
Fruit,
Holiday,
Seasonal
9.29.2010
Soft Pretzels
{i could just eat these all day}
I have to give credit to my dear hubby, Warren, for coming up with the idea of making pretzels. It was his idea. I hate to admit it, but that's what we had for dinner... straight pretzels. Sad, huh? Oh the joys of being poor married students- livin' on a prayer, baby!
Ingredients:
For the dough:
1 1/2 cup warm water
1 tablespoon sugar
2 teaspoons salt
2 1/4 teaspoon instant yeast
4 1/2 cups flour
4 tablespoons melted butter
veggie oil for greasing the bowl
Finishing:
Cooking spray
10 cups water
2/3 cup baking soda
1 egg yolk beaten with 1 tablespoon water
Pretzel or Kosher Salt
Directions:
In a medium bowl, combine water, sugar, salt and yeast. Mix with mixer on low to dissolve yeast. Add in flour and melted butter and mix until just before dough starts to come together. Then add dough to your awesome 1980's Bosch mixer, using the bowl fitted for the dough hook (or if you are living in today's world, your Kitchen Aid mixer with dough hook). Mix until dough comes together and clears the sides of the bowl, about 5 minutes. Transfer dough to a bowl lightly greased with veggie oil, turn once to coat. Cover with plastic wrap and let rise in a warm place for 50-55 minutes, or until doubled in size.
Preheat your oven to 450F. Line two baking sheets with parchment paper, and spray with cooking spray. Bring the 10 cups of water and baking soda to a boil in a large pot.
Divide dough into 8 equal pieces. Roll each piece into a rope shape about 20-24 inches long. Make a "U" shape, and then twist, pinching the ends down to secure (you all know how to make a pretzel shape... we've all watched the guy do it at the Pretzel place in the mall). Don't judge my kitchen... or my husband who has his tongue sticking out.
Once each piece is in the shape of a pretzel, pop one or two in the boiling water. Keep it in there for 30 seconds, removing it using a slotted spatula. Place it back on the parchment paper. Once they have all had their boiling bath, brush them with the egg wash and sprinkle with salt. Then bake for 12-14 minutes or until golden brown or darker on the edges. Let cool before eating!
Serve with whatever you like to eat them with... my top favorites are cream cheese with marinara, nacho cheese, caramel, and chili (weird, huh?).
Directions for freezing:
You can do this many ways, they all work just fine. After the dough was split into 8 pieces, I froze them just in their ball form. You can also twist and boil them, and then freeze, so you just have to bake them straight from the freezer. I don't, however, recommend baking them and then freezing because reheating causes them to be tough and chewy.
Source: Annie's Eats via Alton Brown
I have to give credit to my dear hubby, Warren, for coming up with the idea of making pretzels. It was his idea. I hate to admit it, but that's what we had for dinner... straight pretzels. Sad, huh? Oh the joys of being poor married students- livin' on a prayer, baby!
Ingredients:
For the dough:
1 1/2 cup warm water
1 tablespoon sugar
2 teaspoons salt
2 1/4 teaspoon instant yeast
4 1/2 cups flour
4 tablespoons melted butter
veggie oil for greasing the bowl
Finishing:
Cooking spray
10 cups water
2/3 cup baking soda
1 egg yolk beaten with 1 tablespoon water
Pretzel or Kosher Salt
Directions:
In a medium bowl, combine water, sugar, salt and yeast. Mix with mixer on low to dissolve yeast. Add in flour and melted butter and mix until just before dough starts to come together. Then add dough to your awesome 1980's Bosch mixer, using the bowl fitted for the dough hook (or if you are living in today's world, your Kitchen Aid mixer with dough hook). Mix until dough comes together and clears the sides of the bowl, about 5 minutes. Transfer dough to a bowl lightly greased with veggie oil, turn once to coat. Cover with plastic wrap and let rise in a warm place for 50-55 minutes, or until doubled in size.
Preheat your oven to 450F. Line two baking sheets with parchment paper, and spray with cooking spray. Bring the 10 cups of water and baking soda to a boil in a large pot.
Divide dough into 8 equal pieces. Roll each piece into a rope shape about 20-24 inches long. Make a "U" shape, and then twist, pinching the ends down to secure (you all know how to make a pretzel shape... we've all watched the guy do it at the Pretzel place in the mall). Don't judge my kitchen... or my husband who has his tongue sticking out.
Once each piece is in the shape of a pretzel, pop one or two in the boiling water. Keep it in there for 30 seconds, removing it using a slotted spatula. Place it back on the parchment paper. Once they have all had their boiling bath, brush them with the egg wash and sprinkle with salt. Then bake for 12-14 minutes or until golden brown or darker on the edges. Let cool before eating!
Serve with whatever you like to eat them with... my top favorites are cream cheese with marinara, nacho cheese, caramel, and chili (weird, huh?).
Directions for freezing:
You can do this many ways, they all work just fine. After the dough was split into 8 pieces, I froze them just in their ball form. You can also twist and boil them, and then freeze, so you just have to bake them straight from the freezer. I don't, however, recommend baking them and then freezing because reheating causes them to be tough and chewy.
Source: Annie's Eats via Alton Brown
7.30.2010
Strawberry Lemonade Cupcakes
{I dream in... cupcakes}
Strawberry lemonade, one of the best inventions since sliced bread, improved only when put into a cupcake! Now, I have to admit (because part of growth is making mistakes) I messed up on these pretty badly. I was so upset when I realized my mistake, but I couldn't just throw them out- I had to see them to the end. While I was at the store picking up some lemonade concentrate, I got flustered because the lemonade was no where to be found; this was the last item I needed and I was anxious to get home. What kind of a store doesn't have lemonade?! Rude! So in my fluster, I finally spotted what I thought was lemonade on the very bottom shelve all the way at the back. It was yellow and had lemons on it, so I just grabbed it and left. The recipe calls for a lemonade syrup that you put on the cupcakes before frosting- it was after I had done this to every single cupcake that I realized I didn't buy lemonade concentrate, but grapefruit juice concentrate- no wonder it tasted so bitter. I kind of started to cry, but remembered my favorite quote "there is no nobility in being superior to others; true nobility lies in being superior to your former self" (Hindu Proverb). So despite my small set back, I finished the cupcakes and even tried one to see how horrible they tasted, and to my surprise, they weren't that bad! I will definitely have to explain to everyone why they taste a little off, but overall... not bad! Hopefully you can pay better attention than I can!
Ingredients for cake:
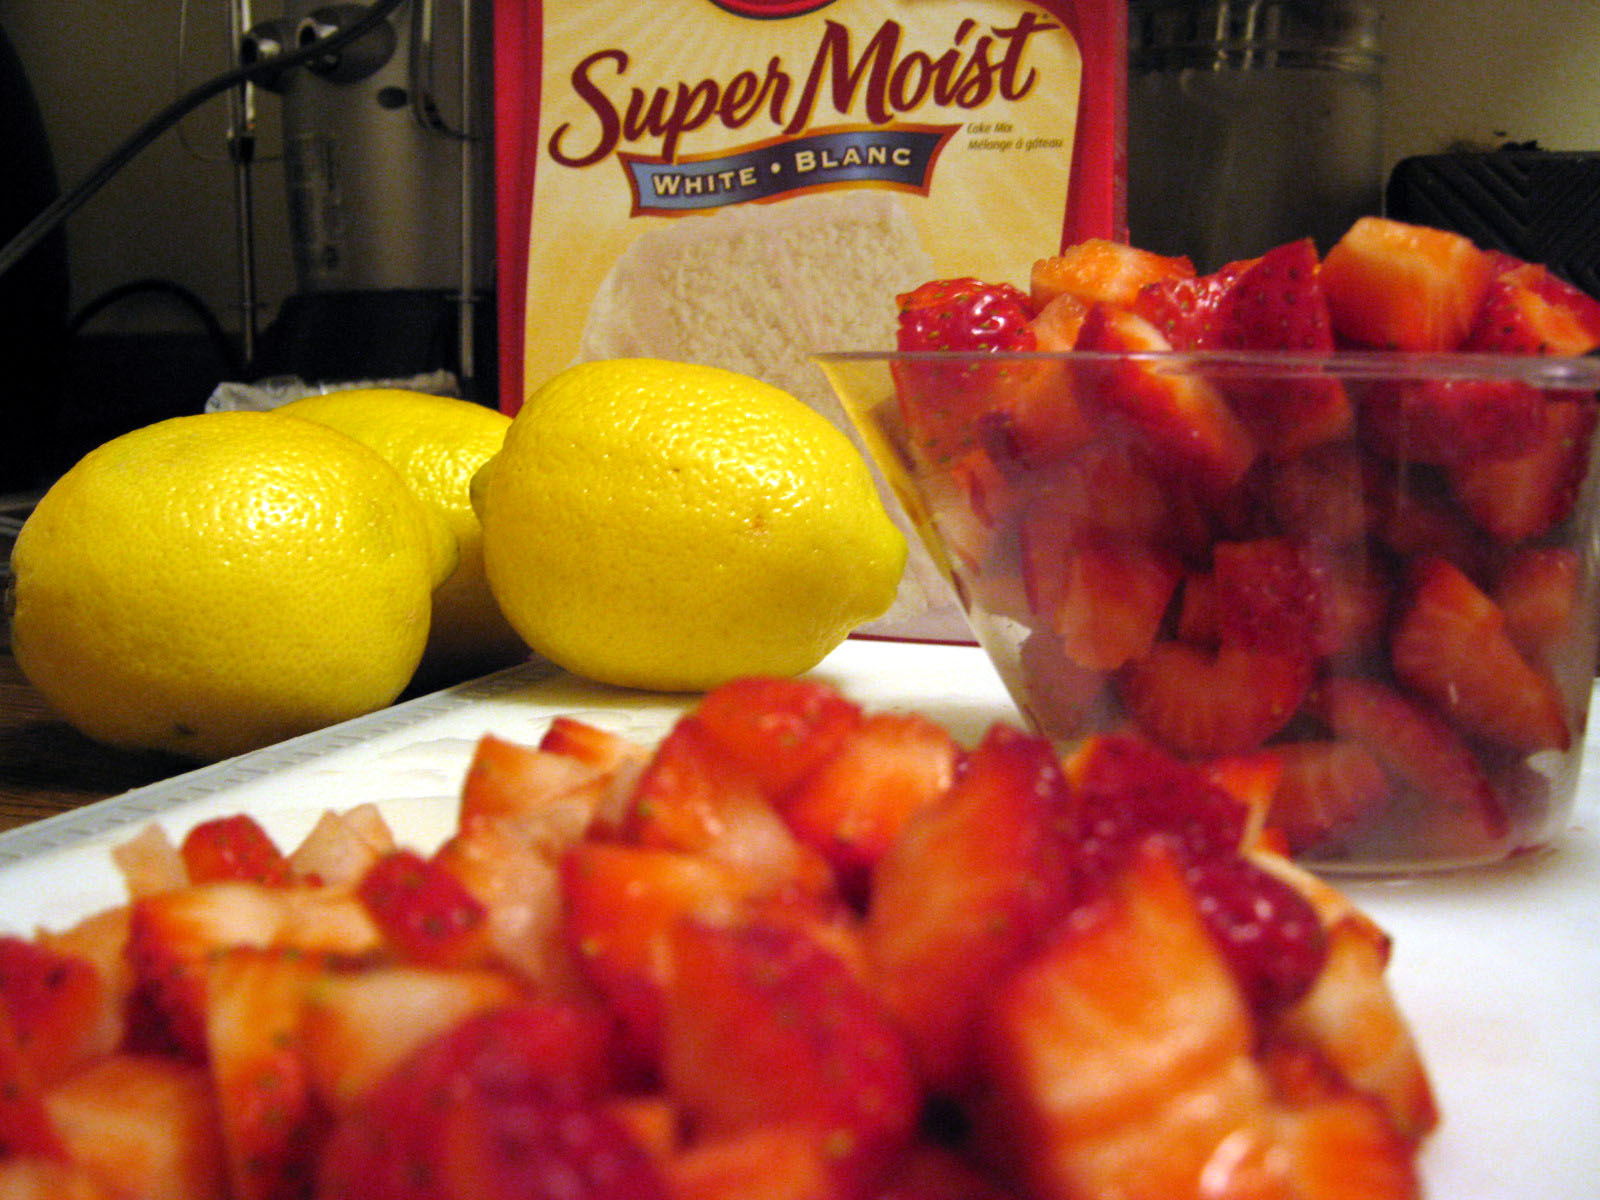
1 White cake mix , and the ingredients to make it (yeah, that's how I roll)
2 teaspoons lemon zest
2 cups fresh strawberries, chopped up really small
Ingredients for syrup:
1 cup lemonade concentrate, thawed
3/4 cup powdered sugar
Ingredients for frosting:
1 (12 oz.) package cream cheese, softened
18 tablespoons butter (that sounded like way too much, so I only used a few heaping tablespoons)
2 2/3 cups powdered sugar
3 teaspoons lemon juice
1 teaspoons vanilla extract
Directions:
Mix cake batter as according to package directions. Fold in lemon zest and strawberries- don't over mix. Divide batter up into cupcake pan, filling half to 3/4 of the way full. Bake according to box directions. Once cupcakes have baked and cooled, poke several holes through the tops of the cupcakes, mix lemonade concentrate and powdered sugar together well. Spoon lemonade syrup over the top of the cupcakes. Let stand about 20 minutes so the syrup can soak in. Beat the cream cheese and butter in a medium bowl on medium speed until light and very fluffy (about 5 minutes). Add the powdered sugar, and mix until smooth. Add lemon juice and vanilla, mix well. Frost cupcakes as desired and garnish with lemon slices and strawberries.
Original recipe adapted from Annie's Eats.
Strawberry lemonade, one of the best inventions since sliced bread, improved only when put into a cupcake! Now, I have to admit (because part of growth is making mistakes) I messed up on these pretty badly. I was so upset when I realized my mistake, but I couldn't just throw them out- I had to see them to the end. While I was at the store picking up some lemonade concentrate, I got flustered because the lemonade was no where to be found; this was the last item I needed and I was anxious to get home. What kind of a store doesn't have lemonade?! Rude! So in my fluster, I finally spotted what I thought was lemonade on the very bottom shelve all the way at the back. It was yellow and had lemons on it, so I just grabbed it and left. The recipe calls for a lemonade syrup that you put on the cupcakes before frosting- it was after I had done this to every single cupcake that I realized I didn't buy lemonade concentrate, but grapefruit juice concentrate- no wonder it tasted so bitter. I kind of started to cry, but remembered my favorite quote "there is no nobility in being superior to others; true nobility lies in being superior to your former self" (Hindu Proverb). So despite my small set back, I finished the cupcakes and even tried one to see how horrible they tasted, and to my surprise, they weren't that bad! I will definitely have to explain to everyone why they taste a little off, but overall... not bad! Hopefully you can pay better attention than I can!
Ingredients for cake:
1 White cake mix , and the ingredients to make it (yeah, that's how I roll)
2 teaspoons lemon zest
2 cups fresh strawberries, chopped up really small
Ingredients for syrup:
1 cup lemonade concentrate, thawed
3/4 cup powdered sugar
Ingredients for frosting:
1 (12 oz.) package cream cheese, softened
18 tablespoons butter (that sounded like way too much, so I only used a few heaping tablespoons)
2 2/3 cups powdered sugar
3 teaspoons lemon juice
1 teaspoons vanilla extract
Directions:
Mix cake batter as according to package directions. Fold in lemon zest and strawberries- don't over mix. Divide batter up into cupcake pan, filling half to 3/4 of the way full. Bake according to box directions. Once cupcakes have baked and cooled, poke several holes through the tops of the cupcakes, mix lemonade concentrate and powdered sugar together well. Spoon lemonade syrup over the top of the cupcakes. Let stand about 20 minutes so the syrup can soak in. Beat the cream cheese and butter in a medium bowl on medium speed until light and very fluffy (about 5 minutes). Add the powdered sugar, and mix until smooth. Add lemon juice and vanilla, mix well. Frost cupcakes as desired and garnish with lemon slices and strawberries.
Original recipe adapted from Annie's Eats.
7.19.2010
Chicken Salad Sandwiches
{the easiest thing to make on the planet}
I don't know about you, but chicken salad sandwiches sound so good during the summer. Plus, you can serve them on basically any kind of bread you want, and they will still taste delicious!
Ingredients:
3 cans of cooked white chicken breast (the ones found by the tuna fish)
1 red delicious apple, cut up into small pieces
1/2 cup Swiss cheese, cubed
1 cup red or green grapes, halved
1 1/2 cups of Mayo
2 stalks of celery (optional)
1 cup of walnuts (optional)
1 teaspoon Worcestershire sauce
1 tablespoon lemon juice
Salt and Pepper to taste
Directions:
Half the grapes, this is quite the tedious task if you ask me. Then cube your Swiss, and cup up your apple. Add all of that into a bowl, and then add the lemon juice. This keeps your apples from turning brown. Then add your celery and nuts, if you so choose (I didn't), and then drain your chicken and add that to your bowl. Measure out your Mayo and mix it with all your ingredients, add Worcestershire sauce and salt and pepper, mix well. Serve immediately on your favorite bread or croissant, or cover and refrigerate.
Enjoy!
I don't know about you, but chicken salad sandwiches sound so good during the summer. Plus, you can serve them on basically any kind of bread you want, and they will still taste delicious!
Ingredients:
3 cans of cooked white chicken breast (the ones found by the tuna fish)
1 red delicious apple, cut up into small pieces
1/2 cup Swiss cheese, cubed
1 cup red or green grapes, halved
1 1/2 cups of Mayo
2 stalks of celery (optional)
1 cup of walnuts (optional)
1 teaspoon Worcestershire sauce
1 tablespoon lemon juice
Salt and Pepper to taste
Directions:
Half the grapes, this is quite the tedious task if you ask me. Then cube your Swiss, and cup up your apple. Add all of that into a bowl, and then add the lemon juice. This keeps your apples from turning brown. Then add your celery and nuts, if you so choose (I didn't), and then drain your chicken and add that to your bowl. Measure out your Mayo and mix it with all your ingredients, add Worcestershire sauce and salt and pepper, mix well. Serve immediately on your favorite bread or croissant, or cover and refrigerate.
Enjoy!
7.15.2010
Pizza Bites
{um, can you say... yum?!}
I was blog stalking one of my favorite cooking blogs, Annie's Eats, and I came across this delectable little recipe. I thought about it for weeks, and finally I decided to try it out. Holy cow, if I never eat a Little Caesar's Pizza again, this will be the reason why.
1 recipe pizza dough (I'd give you mine, but it's actually a family recipe that I can't share, but here is a good one
4 string cheese's (yeah, I know- you can use normal Mozzarella, don't worry)
40 pieces of Pepperoni
Extra Virgin Olive Oil
Italian Seasoning
Garlic Salt
Directions:
Take a small amount of pizza dough, and roll into a ball- should be about the size of golf ball or slightly larger. Then take a chunk of cheese (I cut up my string cheese into 6 equal pieces) and two slices of pepperoni and fold them together inside the pizza dough. To close the little ball of dough, pinch it closed so that there are no holes for cheese to leak out of. Once you have all your little pizza bites made, which you should end up with about 20 or so, place them in a greased 9 inch pie dish and brush with olive oil, then sprinkled with garlic salt and Italian seasoning. Bake at 400F for about 15 minutes or until the tops are slightly golden brown. Serve them with your favorite pizza sauce!
Original recipe from Annie's Eats.
I was blog stalking one of my favorite cooking blogs, Annie's Eats, and I came across this delectable little recipe. I thought about it for weeks, and finally I decided to try it out. Holy cow, if I never eat a Little Caesar's Pizza again, this will be the reason why.
Photo updated 02/08/2011
Ingredients:1 recipe pizza dough (I'd give you mine, but it's actually a family recipe that I can't share, but here is a good one
4 string cheese's (yeah, I know- you can use normal Mozzarella, don't worry)
40 pieces of Pepperoni
Extra Virgin Olive Oil
Italian Seasoning
Garlic Salt
Directions:
Take a small amount of pizza dough, and roll into a ball- should be about the size of golf ball or slightly larger. Then take a chunk of cheese (I cut up my string cheese into 6 equal pieces) and two slices of pepperoni and fold them together inside the pizza dough. To close the little ball of dough, pinch it closed so that there are no holes for cheese to leak out of. Once you have all your little pizza bites made, which you should end up with about 20 or so, place them in a greased 9 inch pie dish and brush with olive oil, then sprinkled with garlic salt and Italian seasoning. Bake at 400F for about 15 minutes or until the tops are slightly golden brown. Serve them with your favorite pizza sauce!
Photo updated 02/08/2011
Original recipe from Annie's Eats.
6.06.2010
Seven Layer Dip
{a classic crowd pleaser for all ages}
I made this dish for a group of friends, it was gone in 15 minutes. But I don't mean to brag ;)
Ingredients, in order:
1 can refried beans
3 mashed avacado's with lemon juice and green tabasco sauce
1/2 c mayonnaise with 1 cup sour cream
3 chopped tomatoes (I used about a 1/2 cup [more or less] of salsa)
1/2 cup green onions, chopped
1 cup grated cheddar cheese
1 small can of chopped, black olives
Layer on a serving platter in order, don't forget the chips!
I made this dish for a group of friends, it was gone in 15 minutes. But I don't mean to brag ;)
Ingredients, in order:
1 can refried beans
3 mashed avacado's with lemon juice and green tabasco sauce
1/2 c mayonnaise with 1 cup sour cream
3 chopped tomatoes (I used about a 1/2 cup [more or less] of salsa)
1/2 cup green onions, chopped
1 cup grated cheddar cheese
1 small can of chopped, black olives
Layer on a serving platter in order, don't forget the chips!
Subscribe to:
Posts (Atom)